I’ve just arrived back from 5 glorious days in Eryri, having successfully passed my Summer Mountain Leader Assessment! Perfectly timed to unveil P600 Mountaineering to the world!
Now that I’m a qualified Summer Mountain Leader, I offer guided walks, navigation training, and bespoke mountain experiences across the UK.
Learn more about my services here.
I’m aiming to capture thoughts and experiences of my journey through the Mountain Leader qualification and hopefully offer a useful insight for others thinking of pursuing training and development in mountain craft.
A big part of training as an ML for me, is being able to Inspire and Empower others to Explore the wild places of the UK. This isn’t just about formal training like the Mountain Leader Scheme, but also through offering an informal insight into various aspects of the Mountain Environment, to give them confidence to get out and appreciate the holistic benefits the outdoors offer.
What happens during consolidation phase?
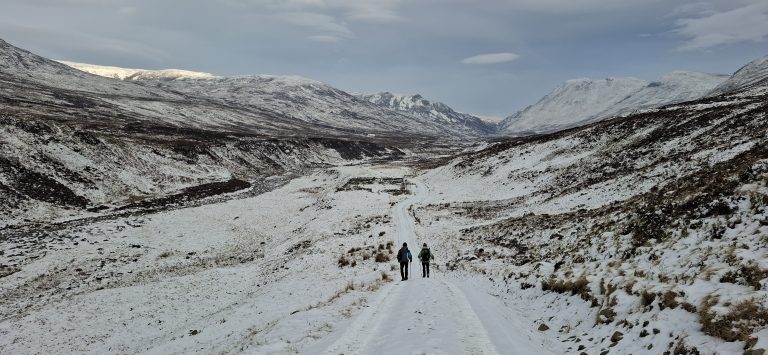
As discussed in part one, after your training week, you’ll then move onto your consolidation phase. In my experience, this is where the real learning begins.
Now that you know what the standard is to be a mountain leader, this is your opportunity to get out and practice that, while gaining the experience required to build up your logbook.
The minimum requirement for number of Quality Mountain Days is 40, including the 20 you needed before assessment. I must stress that this is the minimum, and almost everyone I spoke to said that I’d need to exceed that if I wanted to stand a chance of passing. This was because one, the assessor was likely to throw a few out and say they didn’t meet the standard of a QMD. More importantly, if you don’t have a broad range of experiences, which comes with spending time out on the hill, you probably won’t have built up the knowledge to confidently and efficiently operate at the standard required.
By the time I presented for assessment, I have 132 records in my logbook, of which 76 were QMD’s. Now, I’m not saying you have to almost double the minimum requirement, but if you have a genuine passion for being in the hills, getting to this level won’t feel like a chore at all.
This is advice that I’ve given to others considering their ML; Get out and do loads of mountain days, because if you don’t enjoy it, you won’t enjoy the process or the work it opens up afterwards. Enjoy the journey, and it won’t feel like you’re working towards an exam.
Things to do during your consolidation period.
There are a few things you’ll need to do during your consolidation phase.
- Buy new kit – like me, you’ll have found some of your kit works, and some of it doesn’t stand up to the demands you’re putting on it. Now that you’ve decided to invest time and effort into this, it’s worth investing money into the kit that’s going to make it possible. Don’t just throw money at it though; All kit wears out eventually so strike the right balance between quality and cost.
- Book your First Aid course – You’ll need to have a 16-hour first aid course before your assessment. I’d advise you go for an outdoor first aid course, as this will be more relevant to the situations you’ll encounter on the hill, kit you’ll likely have on hand when in a remote location, and skills you’ll need to deal with that.
- Keep your DLOG updated as regularly as you can. I started my logbook entries pretty much without fail as soon as I got home from my walks. This meant that I was able to capture the key information about the day while it was still fresh in my mind. I would then take a day or two to reflect on the day, before populating the description. This makes it so much easier to capture everything and means you won’t forget to add anything to the logbook. Afterall, you’ve done the hard work of climbing a mountain, you don’t want all that effort to go to waste by forgetting to write it down.
What is a Quality Mountain Day?
As outlined on the Mountain Training Website:
A ‘Quality Mountain Day’ for the Mountain Leader should take place in mountainous terrain in the UK or Ireland. For the purpose of the Mountain Leader scheme, ‘mountainous country’ may be defined as wild country which may contain unavoidable steep and rocky ground where walkers are dependent upon themselves for immediate help. In the United Kingdom and Ireland this includes:
- Wales (Cymru): Eryri (Snowdonia) & Bannau Brycheiniog (Brecon Beacons)
- England: The Lake District
- Scotland (Alba): Scottish Highlands & Galloway Hills
- Northern Ireland (Tuaisceart Éireann / Norlin Airlann): Mountains of Mourne
- Republic of Ireland (Éire): Cork and Kerry Mountains, Galway and Mayo Mountains, Donegal Mountains, Dublin and Wicklow Mountains
The quality element lies in such things as the conditions experienced both overhead and underfoot, the exploration of new areas, the terrain covered, the skills deployed and the physical and mental challenge. The experience of a quality day should contribute to knowledge, personal development and associated skill acquisition. All the following criteria should be fulfilled:
- The individual takes part in the planning and leadership.
- An unfamiliar locality is explored.
- A mountain is ascended.
- Navigation skills are required.
- Knowledge is increased and relevant skills practised.
- Judgement and decision making is required.
- Five hours or more journey time.
These criteria mean that days as a course member under instruction, a member of a group practising skills, or days spent repeating familiar routes are very unlikely to meet the requirements of a quality day.
Some of my favourite Quality Mountain Days included:
The Aonach Eager Ridge – A legendary Grade 2 scramble in Scotland, billed as second only to the Cuillin Ridge on Skye
Cairngorm 4000’s – A massive day out bagging five of the UK’s highest mountains.
Nanttle Ridge – A stones throw from Snowdon, with all of the views and none of the crowds.
Scottish Winter Meet – A fantastic week of winter mountaineering with Shrewsbury MC; My solo adventure on the Munro’s West of Drumochter was a highlight.
When to book your Mountain Leader Assessment?
How long you leave it between Training and Assessment is a very personal thing. It ultimately comes down to how often you’re able to get out into the hills and how quickly you clock up your 40+ QMD’s.
I decided to target sitting my assessment 12 months after my training course. This gave me something to focus on, but also meant I was out every weekend doing a least one day in the mountains and often two. I also used all my annual leave heading further afield, especially getting up to Scotland. This is quite an investment of time and effort, and according to the Mountain Training website, the average time from training to passing assessment is 3.3 years. The longer you leave it though, the more chance there is that you’ll start to forget some of the skills and techniques, or diverge away from the standard way of doing things per the syllabus; You might want to consider a refresher day if this is the case, to ensure everything is fresh before your assessment.
Other things to consider
These aren’t essential but worth thinking about!
- Accommodation – Once you’ve booked your ML Assessment , it’s also worth considering whether you need accommodation during and/or after. Your assessment will be 5 days, and you’ll be on expedition for 3 days / 2 nights. Getting a decent night sleep and avoiding a long drive on the first day of your course is a good idea. You’ll need somewhere to stay for the first few days, and you might consider staying somewhere local the day after your course if you have a long drive home.
- Skills Courses – There are many courses that you might consider, to supplement your specific areas of your mountain craft. I touched on refresher courses above, but you might also want to focus on something specific like Navigation on different scales, a Contour Masterclass, or Ropework Skills for example. Your provider might offer these, or you might find getting out with someone else gives you a fresh perspective. Reach out if I can help
- Knowledge Courses – You might also want to focus on developing a deeper knowledge in one or more of the wider areas related to mountain craft. This might include Mountain Weather (I found the MWIS ones were really helpful), Fauna and Flora (Mike Raine has a great reputation), or you might even consider learning Cymraeg / Welsh, Gaelic, and Irish, if you’re taking your assessment in one of these areas and aren’t a native speaker (I found learning some basic Welsh helped with interpreting features on the map… Don’t plan a leg directly through that Llyn, or you’ll be getting a bit wet!)
- Shadowing – You might also find shadowing another Mountain Leader on one of their events is useful, giving you an insight into how they operate professionally and giving you the opportunity to practice your skills on real clients with the safety blanket of another ML. This won’t count towards your QMD count, but I found I learnt a lot on the few events I shadowed other ML’s on.
Mountain Leader Assessment
I opted to book my assessment with the same provider that I’d done my training with – Phill George. You’re free to book with any provider, as both the training and assessment courses are standardised against the Mountain Training syllabus. The choice ultimately comes down who’s style you like; I liked Phill and his team, so staying with him was a safe option.
During the training Week, you’ll likely have been in a group of 6 and been assessed by two instructors over the week. On assessment, you’ll be in a group of 4 and again will see at least 2 assessors. Although this means there will be slightly more focus on you, as there are fewer candidates, I found the small group allowed me to build a better rapport with the assessor and other candidates, and you also have fewer “clients” to worry about!
Like part one, I’ll share my itinerary from assessment week along with my reflections but do bear in mind other providers may run their courses slightly differently based on their preferences and in response to prevailing weather conditions.
Day 1 – Mountain Journey on Moel Siabod
Like training week, we started day one with an overview of the scheme and itinerary for the week. We also did introductions to get to know each other.
After this, you guessed it, we spoke about the weather! The forecast for the day was warm and sunny, with a risk of thunder from mid-afternoon.
As part of our preparation for assessment, we were also asked to complete a home paper. This was a series of 50 questions covering a diverse range of topics related to mountaineering. The purpose of this was not strictly to test our knowledge, but more to prompt us to expand our thoughts beyond the narrow requirements of the Mountain Leader Scheme, and invoke some discussion on some of the more controversial areas (Was it the 1924 Mallory & Irvine expedition or 1953 Hillary expedition that was the first? What’s the definition of a successful summit? Do you need to get down again for it to be a success?) Don’t worry, a journey with P600 Mountaineering usually includes getting back to the car with the same number of group members!
There were 8 candidates on my assessment, so after the group discussions, we split into two teams and had a detailed chat about the day ahead with our respective instructors.
Our plan was to stay relatively low, due to the lightening risk, and head to the lower slopes of Moel Siabod. Here, we would focus on going for a mountain journey, encompassing navigation, group management and leadership and some security on steep groundwork.
In contrast to training week, there was a greater focus on our ability to pull everything together and deliver an enjoyable day out in the mountains holistically. This meant that when it was our turn to lead, we were not only thinking about getting to our destination and keeping everyone safe but were also sharing interesting facts and stories along the way.
Not only does this add to the interest of the journey, but also demonstrates that we have enough spare capacity, beyond purely navigating, to be able to think about our group and their comfort.
The navigation legs were also a little more challenging than training week, aiming for slightly more subtle natural features, albeit still being the standard spurs, re-entrants and ring contours, with a few sheepfolds and stream bends thrown in.
Another concept that had more focus during assessment was the rest of the group keeping track of where we were when not in the hot seat. This meant that we had to keep focused throughout the entire day and couldn’t sit back when it wasn’t our turn to lead. This was assessing our ability to keep track of where we’d been, and quickly assess where we were, based on the direction of travel, time taken and ground to map contour interpretation; Again, super useful skills so you can spend less time sticking precisely to the map and more time going for an enjoyable journey with your group while knowing roughly where you are along the intended route at all times and able to precisely locate yourself using what you can see around you and where you know you’ve been.
Day 2 – Rope Work and Security on Steep Ground on Y Garn
The structure of the day was consistent by this point. We started with a chat about the weather and what this meant for our high-level plans for the day. From this point in, we knew we were almost certainly going to get wall to wall sunshine for the rest of the week. While staying warm and dry was a stark contrast from my training week, sunburn, dehydration, heat exhaustion and heatstroke were all risks that we had to consider and mitigate in ourselves and watch out for in our group.
The focus today was more heavily on steep groundwork, while still needing to demonstrate all the other navigation group management and storytelling skills.
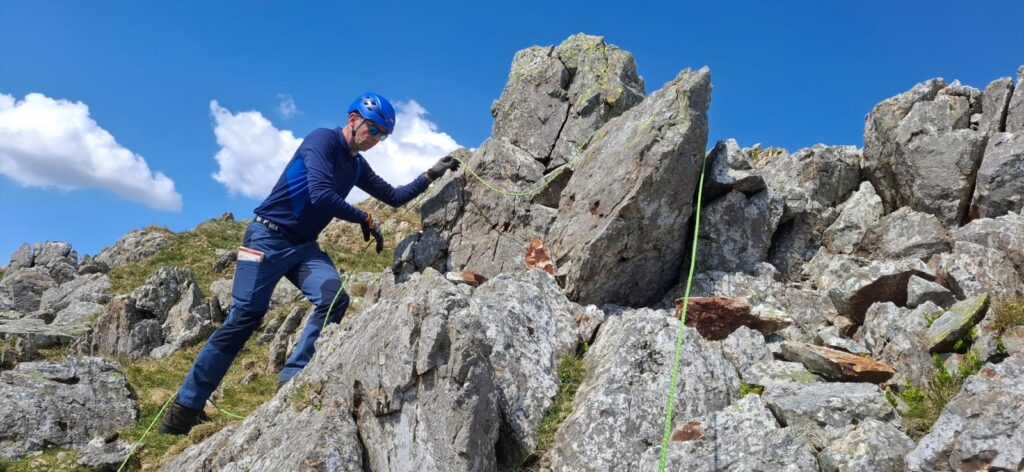
We parked in Nant Peris and headed up the southwest slopes of Y Garn, seeking out the steep craggy ground on which we could demonstrate our ability to lead through more challenging terrain. Eventually, the ground got steep enough that ropes were required; There were no tricks here, our assessor said from the outset he would tell us when we needed to use ropes; Remember, on Mountain Leader you shouldn’t be planning to use a rope, so it could feel a little bit challenging to know when your expected to pull it out without this clear communication.
Splitting into pairs, we each took turns to use direct and indirect belays while bringing our counterpart up and down a small steep section. This assessed our ability to identify and select a suitable anchor (we could only use or anchor once, then had to select another one), in addition to the skills to safely belay.
After this we had to demonstrate a South African Abseil; You can use whichever abseil you’re familiar with, so while SA seems to be the standard one taught these days, and we were specifically asked to use it, other providers might use a different one, and you should be okay to deploy your preferred style as long as you execute it safely and effectively.
The same goes for knots, too. You’re perfectly fine to use a simple overhand knot. It’s safe, efficient and very hard to get wrong. If you’re more familiar with figure-8 or bowline knots, these are fine too, just make sure you get them right as you’ll assessed on your ability to work safely, not your knowledge of fancy knots!
Day 3 – Expedition, Wild Camp and Night Navigation
This was the start of the expedition, so we took some time to finalise the plans for the next three days. As a group we discussed a few things to make things easier for each other. Firstly, we each went through what we had packed in our bags, then rushed off to grab the bits we’d forgotten or took out the excess stuff that we didn’t think we’d need. We also agreed as a group who would carry the groups safety equipment (Shelter and first aid kit) as these can be bulky and heavy, and we only needed one of each in the group. Discuss this with your assessor to make sure they’re okay with it, but ours was onboard with us sharing the load.
Then, as we were planning a linear route through the Moelwynion, we agreed on car sharing arrangements and ensured we had transport at the end of the route for when we got back (It would have been a very long walk back to the start, retracing 3 days’ worth of steps, if we’d forgotten to do this!)
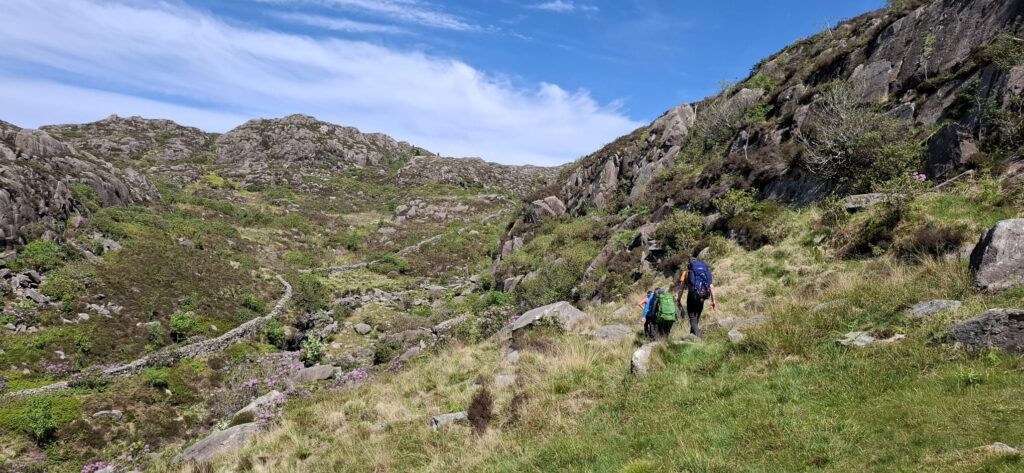
It was much the same again, as we walked into the mountains. We each took turns to navigate, tracking where we were, telling stories, keeping safe and generally having a wonderful time.
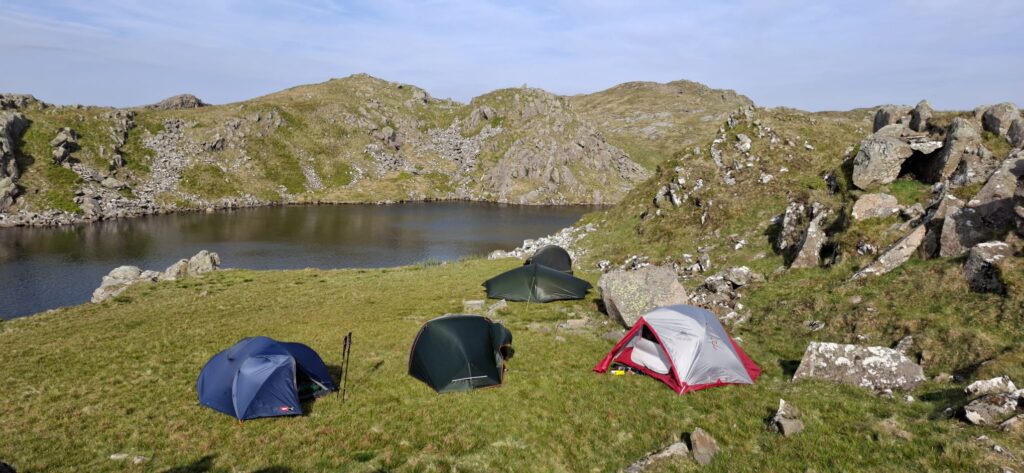
We arrived at our wild camp spot for around 6pm, taking a few minutes to find the flattest, dryest, rock free area with shelter from the wind. This wasn’t too hard to find but was critical to a good night’s sleep!
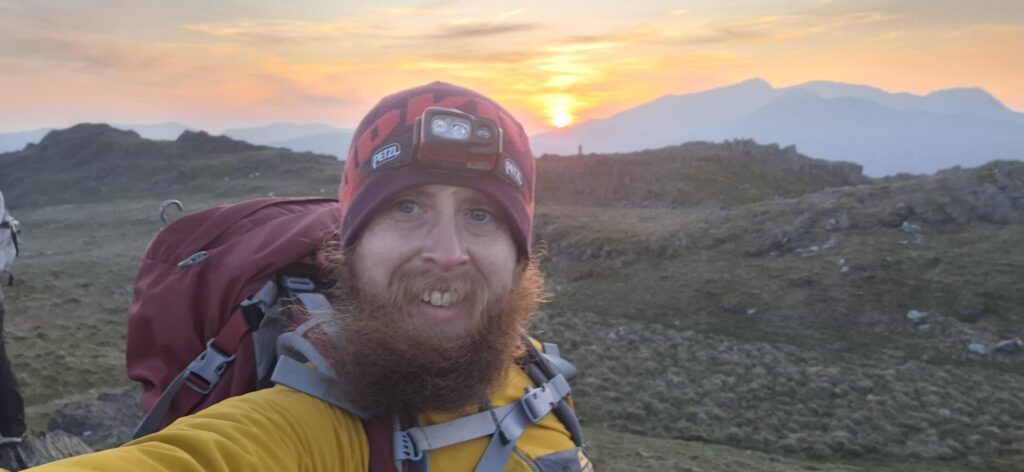
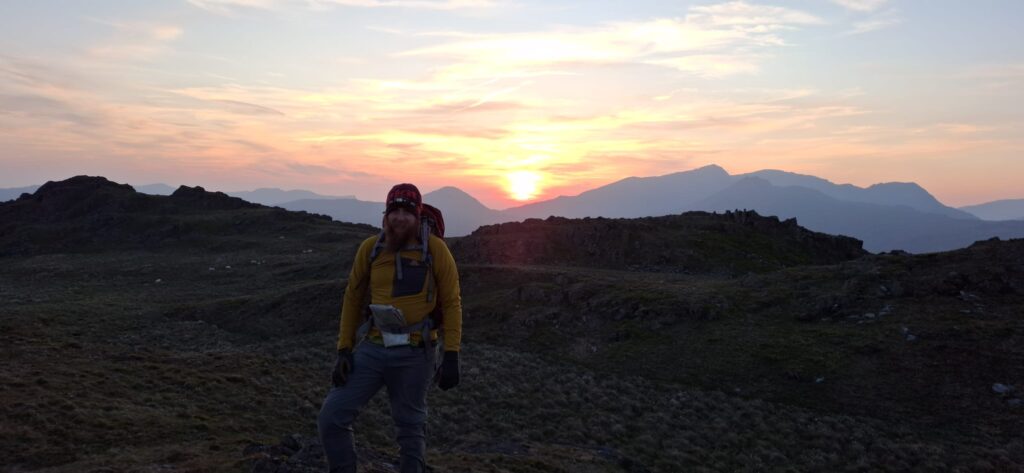
We had some free time after this, with a plan to reconvene at 9pm to watch the sunset and then head off for night navigation.
This gave us time to sit and appreciate our surroundings.
It was also a suitable time to collect water from the nearby source, filtering and treating it ready for use later. We also took the opportunity to get our heads down and have a nap ready for the night ahead.
At around 7:30pm, we congregated around a nice spot slightly away from the tents, with a conveniently flat rock upon which we lit our stoves, made coffee and cooked dinner. It was nice to be able to sit around together and discuss our meal choices; While I stayed on brand with my Huel Hot and Savoury, which I’d been eating all week anyway, my colleagues enjoyed their dehydrated high calorie meals.
Then it was time to wrap up, don our head torches and head off into the darkness. We were told to be prepared to be out for four hours, so we were looking at a 2am finish by the time we’d gathered and convinced out assessor it was dark enough to get going (it was still broad daylight at 9:30pm when he eventually relented!)
Much like the structure we’d followed so far, the task was to take it in turns navigating to features on the map like Spurs, Re-Entrants and Ring Contours, while the rest of the group kept track. The key difference here was we didn’t need to focus so much on the group management aspect; This was ultimately a test of our ability to navigate using just the map and compass, using bearings, pacings, timing and interpretation of micro features rather than looking at the wider landscape to give us more information.
We each had 2 legs and covered around 2 miles over the course of 3 hours. We were quietly confident as we climbed back into our tents at 12:30am; It must be a good sign that we were back sooner than expected, having reached each of our navigation points without too much trouble. If the assessor had any concerns, he’d have probably kept us out a little longer to give us chance to demonstrate our skills and give him the chance to understand what might be going wrong, and why.
I climbed into my sleeping bag, and sipped my much deserved hot chocolate, before settling down for a good nights sleep before the long day ahead tomorrow.
Day 4 – Mountain Journey through the Moelwynion
We were up for around 7:30 on day four, keen to get the tents packed away early to minimise our impact on the area. I’ve got my decamp process dialled in well now, so had the sleeping mat and bag packed away within minutes of waking up. This gave me more space to play with in the tent. I then packed my sleeping system into the bottom section of the rucksack before moving it outside, swiftly followed by my cooking system which I keep in a dry bag to keep it all compact. I then collapsed the tent, systematically packing it away into the rucksack, before giving the area a quick check over to make sure I’d left no trace.
I then moved onto breakfast, enjoying a hearty double helping of porridge which I’d pre-portioned in zip lock bags and a coffee to get the day started.
After this, I collected two more bottles of water, filtering them through my LifeStraw, and then treating them with AquaProve. Although collecting water from a running source high in the mountains means it’s probably fairly safe already, I can’t afford to get ill while in a remote location, and especially not while on my assessment. That’s why I tend not to take any chances and use the physical filtration and chemical purification combination.
The LifeStraw acts as a physical barrier, filtering out virtually all bacteria and parasites in addition to contaminants such as microplastics, silt, sand, and cloudiness, with a pore size of 0.2 micron.
The AquaProve then chemically eliminates any remaining harmful parasites, pathogens and bacteria. The great thing about AquaProve is that you can treat as much or as little water as you need, as it is prepared in a small bottle and you just add one drop per 250ml; This is much more convenient than other purification methods where you have to add a tablet to a litre of water each time. AquaProve also renders the water ready to use within 5 minutes, while other types take up to 30 minutes to work.
While I was collecting my water, the rest of the group were packing away the last of their tents, so we convened for 9am and discussed the day ahead. We were in for another hot and sunny day, but were in no rush, as we couldn’t arrive at the next camp site until after 5pm, to minimise our impact on the area.
We were solely using 1:50k maps from here on in. Be sure to practice nav on more than one scale during your consolidation phase, as it can take a while to get your head around switching. Given all the nav is done using contour lines and natural features, it can really throw you out if you’re looking for a Tennis court sized ring contour and find yourself stood on a plateau the size of a football field.
As an aside, I actually really like the Harvey 1:40k Mountain Maps, as they give you the big picture offered by OS 1:50k, but are less busy as the features marked are tailored to mountain users and don’t show less useful stuff which tends to be man made and less reliable anyway. I treated myself to the full set of British Mountain Maps, and almost exclusively use them when I’m in Scotland.
Again, the day was essentially a mountain journey where we took turns to lead a leg, looking after the group and keeping them engaged throughout. While not leading, we had to keep track of where we were.
However, there were a few changes today: Walking on a bigger map scale meant our legs were much longer, so it was less about walking from point to point, and more about simulating a realistic journey through the mountains, finding a natural route that a group would enjoy. We also stopped getting feedback on whether we were at the right destination or had identified where we were on the map correctly. This was a new addition to the syllabus, as I understand it. This is actually how I expected the whole course to run, and I think is a good way to check candidates can actually identify their own mistakes – After all, we won’t have a helpful instructor looking over our shoulder in the real world, when we have clients getting cold and wet on the hill while we’re staring at the map!
Overall, it was an enjoyable day in the mountains. We took it at a relaxed pace, had plenty of breaks and had some great conversations – not all related to the Mountain Leader Assessment, but most led back to the outdoors in one way or another!
By the end of the day, the assessors had all but made up their minds on how we were performing. Our final campsite wasn’t too far from the road, and therefore the cars that we’d left on day three. Once the tents were set up, we went and collected the cars which we’d left at the start, to make things easier in the morning.
We might have nipped to the pub on the way back, to celebrate our final night together, before climbing back into our tents for one last sleep before the day of reckoning.
Day 5 – Escape from the mountains and debrief
The last day of assessment was a straightforward affair; We were up and out by 8:30, ready to meet at Caffi Gwynant for 9am. Here, we enjoyed a hearty breakfast, exchanged numbers and shared photos that we’d taken throughout the week.
One by one, we made our way into the private booth where the assessors exchanged notes, deliberated and then passed down judgement on our performance.
I’m pleased to say, I received a resounding pass from the three of them. I was commended on my logbook, knowledge of fauna and flora and accurate contour interpretation.
I wasn’t perfect every time, but I did pass the ultimate test:
“Would I let this person take my kids up the hill?”
Top tips for your Mountain Leader Assessment
- Take your time throughout – even if you think you know where you are, or where you’re planning to go, double check and be confident before moving on.
- Accept that you’ll make mistakes – you won’t fail for one mistake, so don’t let it play on your mind. If you realise you’ve made a mistake, tell the assessor, they’ll actually like the fact you can spot your own errors and correct them.
- The learning process doesn’t stop here – You’ll definitely learn something new on assessment from one of the other candidates or the assessor. No one will judge you for being receptive to new ideas, so be open, ask questions and continue to grow! I learnt about a few new types of fungus from one of the other candidates, and used this knowledge later in the week.
- Don’t try to be an expert in everything – The Mountain Leader Qualification is about becoming a well rounded mountaineer who can take clients into the hills for a safe and enjoyable day. Consider the phrase “A jack of all trades is a master of none, but oftentimes better than a master of one”; You’ll want to be good at everything, but trying to be an expert in one area may be detrimental to the others and trying to master everything could result in overwhelm. I had a particular interest in Reptiles which is a niche area of the syllabus, so I learnt a few facts about these which I thought would add value to the experience of my fellow candidates and assessor, but didn’t solely focus on this as it would have prevented me from covering other areas.
- Pack enough kit – to deal with every eventuality during assessment week. For me, this pretty much meant bringing all of my outdoor gear so I had it to hand and could make informed decisions on what to carry daily, as the week progressed.
- Carry appropriate kit – for the day ahead each day; Day 1 I had a full set of Gore-Tex Pro waterproofs in my bag, as there was a real risk heavy rain. I also wore my 2nd pair of boots, so if we did get soaked, I’d be able to switch into my favourite pair while they dried out. As the week progressed, it was unlikely that we’d have rain, so I stopped carrying waterproof trousers and carried a lighter weight jacket, more for it’s windproof properties that it’s waterproofness. Keep your options open so you can do this.
- Get to know your fellow candidates – Then work with them to make the whole process as easy and enjoyable as possible. You won’t all have to carry a rope, first aid kit and shelter every day, so have a chat and see who’s kit is the lightest and easiest to carry, then spread the load. Also check with the assessor what kit they expect you to carry each day; we only needed our helmets on day 2 and didn’t need helmets or ropes during exped – that was easily 1kg of weight saved for each of us!
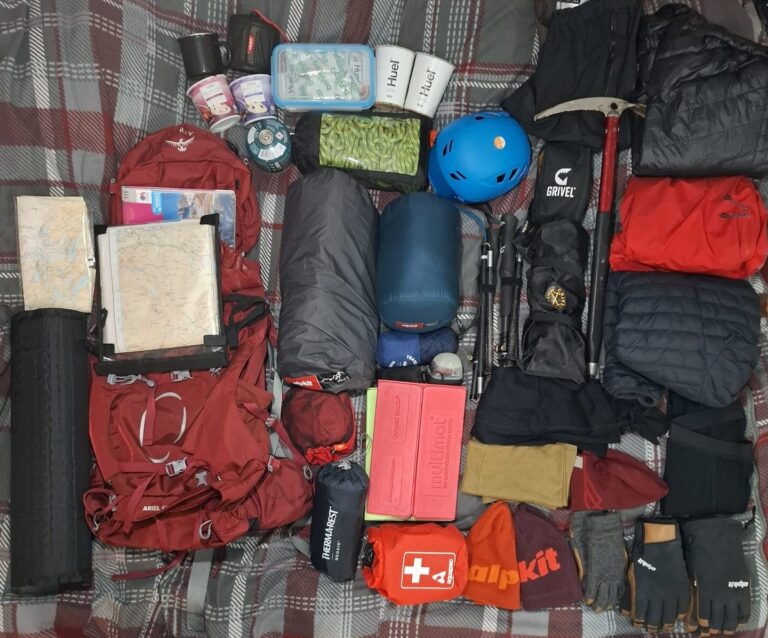
Mountain Leader Kit List
For the purpose of your assessment, your provider will probably tell you what you need to bring for the week. Going forward, and as you start operating as a fully fledged ML, this will also be a good guide for what you’ll need.
Of course, everyone will have their own preferences and will add to and remove a few of these items from their arsenal, and your consolidation period will have given you a good idea of what works for you and what doesn’t.
I hope you’ve found my journey to becoming a Mountain Leader insightful.
I’m always happy to discuss any questions you might have about the process, or join you on the hill for a QMD, if you’d benefit from an external perspective or just want some company. Having just been through the process, it’s all quite fresh in my mind, however, I’m obviously not an approved trainer or assessor.
You can reach me via:
Email: P600Mountaineering@outlook.com
Instagram: @P600Mountaineering
Or, leave a comment below
Good luck on your Mountain Leader journey and I look forward to seeing you in the hills soon!